Lesson 3: Calendars

Knowledge Base Hub > ​Navigating Your AMPLY Account > Lesson 3: Calendars

Calendar Overview

The Calendar tab in AMPLY is a powerful tool designed to help you manage appointments, events, and tasks seamlessly.

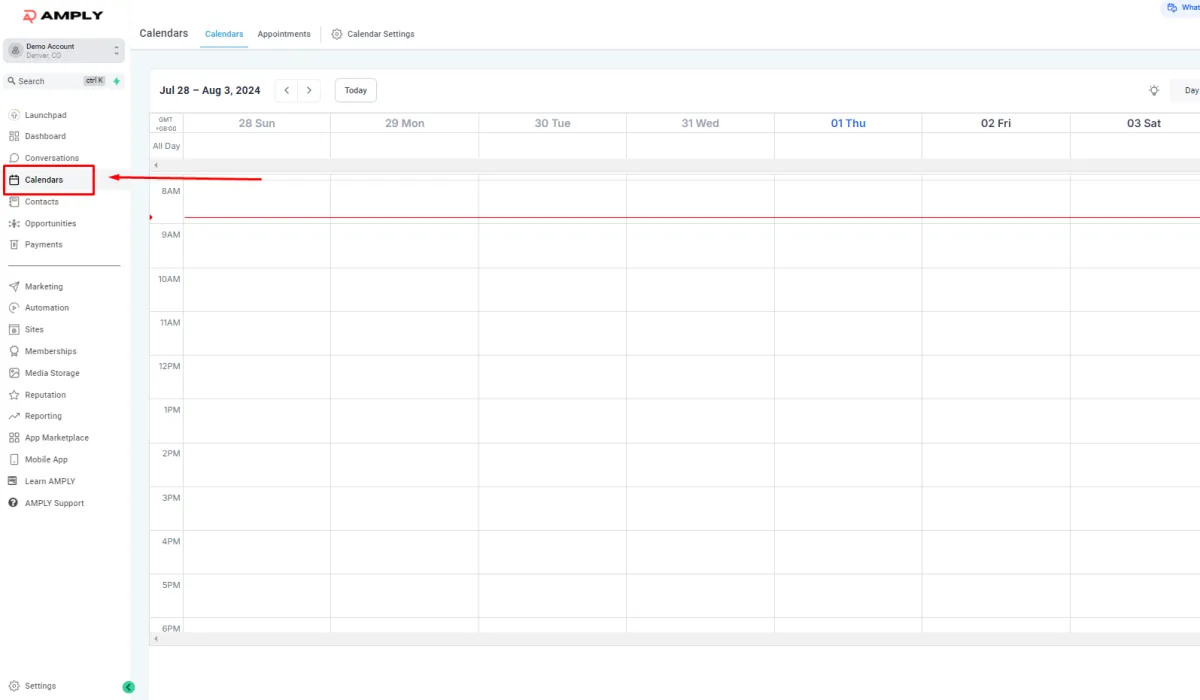
Step 1: Access the Calendar Tab

● Log in to your AMPLY account.

● From the dashboard, navigate to the left-hand menu.

● Click on the Calendar tab, located below the Conversations tab.

Step 2: View the Calendar

● Upon clicking the Calendar tab, you will see the default calendar view.

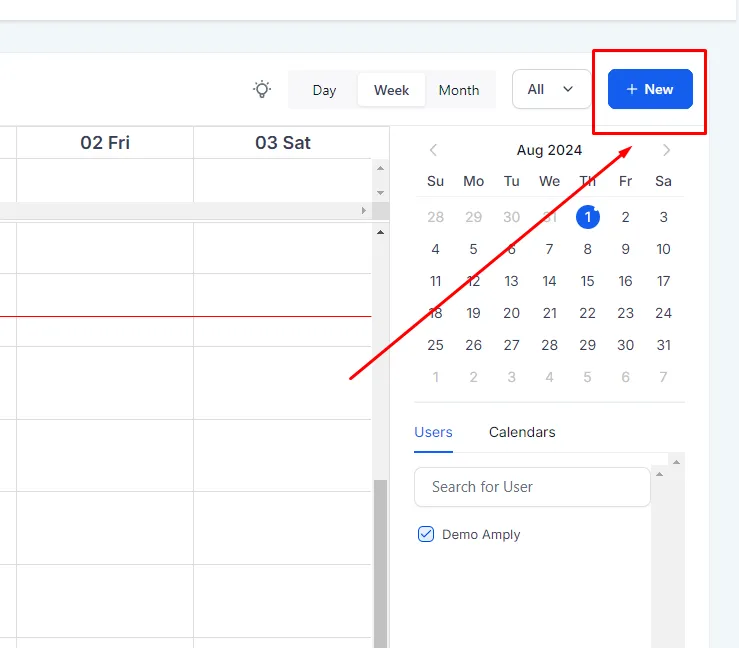
● You can switch between different views:

- Day View: Shows your schedule for a single day.

- Week View: Displays your schedule for the entire week.

- Month View: Provides an overview of your schedule for the month.

Step 3: Add a New Event or Appointment

● Click on the + New Event button or simply click on a date/time slot within the calendar.

● Fill in the details for the event or appointment:

● Title

● Date and Time

● Description

● Location

● Invitees
● Set reminders or notifications if needed.

● Click Save to add the event to your calendar.

Step 4: Manage Appointments

● Click on any event or appointment in your calendar to view its details.

● You can edit, reschedule, or delete the event as needed.

● Use the Search function to quickly find specific events.

● If you want to cancel the schedule message, click the pencil icon, select the Cancel Send Link, and close the pop-up.

Contact Us

Need help with your AMPLY account?

Join our Community!

Connect with thousands of AMPLY users just like you!