Lesson 4: Contacts

Knowledge Base Hub > ​Navigating Your AMPLY Account > Lesson 4: Contacts

Contacts Overview

In this tutorial, we’ll provide an overview of the Contacts section of your menu. Read on to learn how to navigate through this section.

1. Contacts List

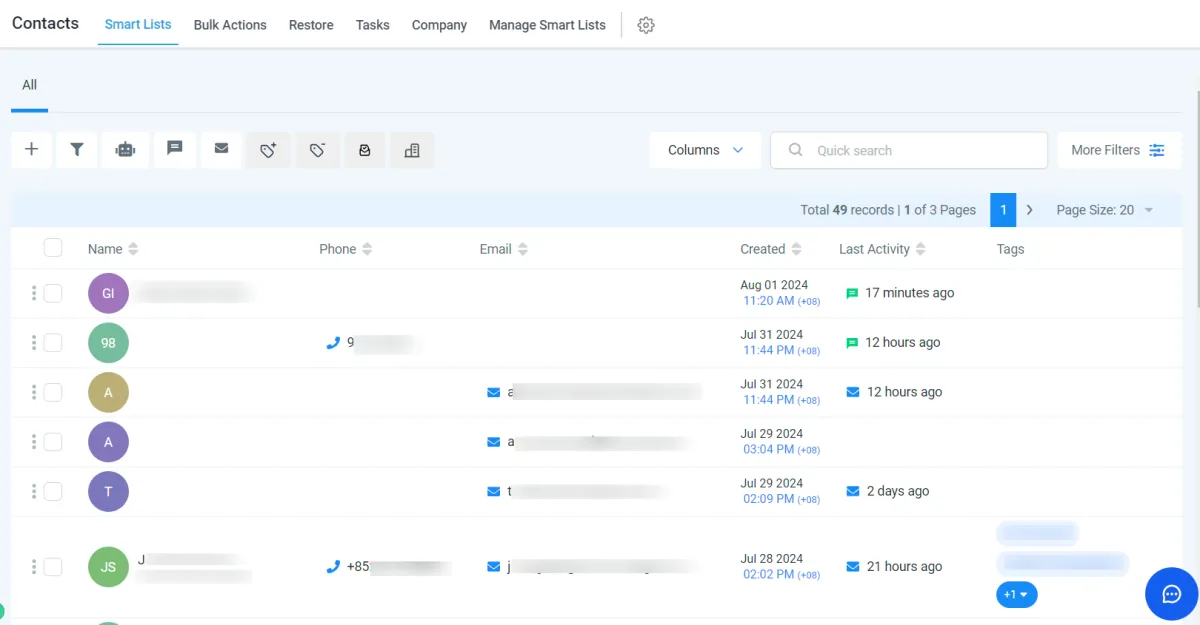
The Contacts List is the primary area where all your contacts are displayed.

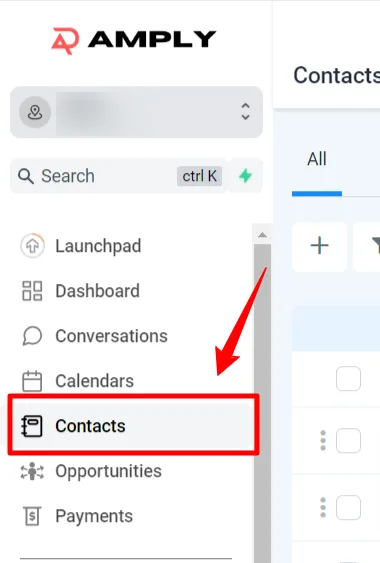
● To access, click "Contacts" on the left panel.

Viewing Contacts: By default, the Contacts List shows all your contacts. You can scroll through the list.

Or you can use the search bar at the top to find a specific contact.
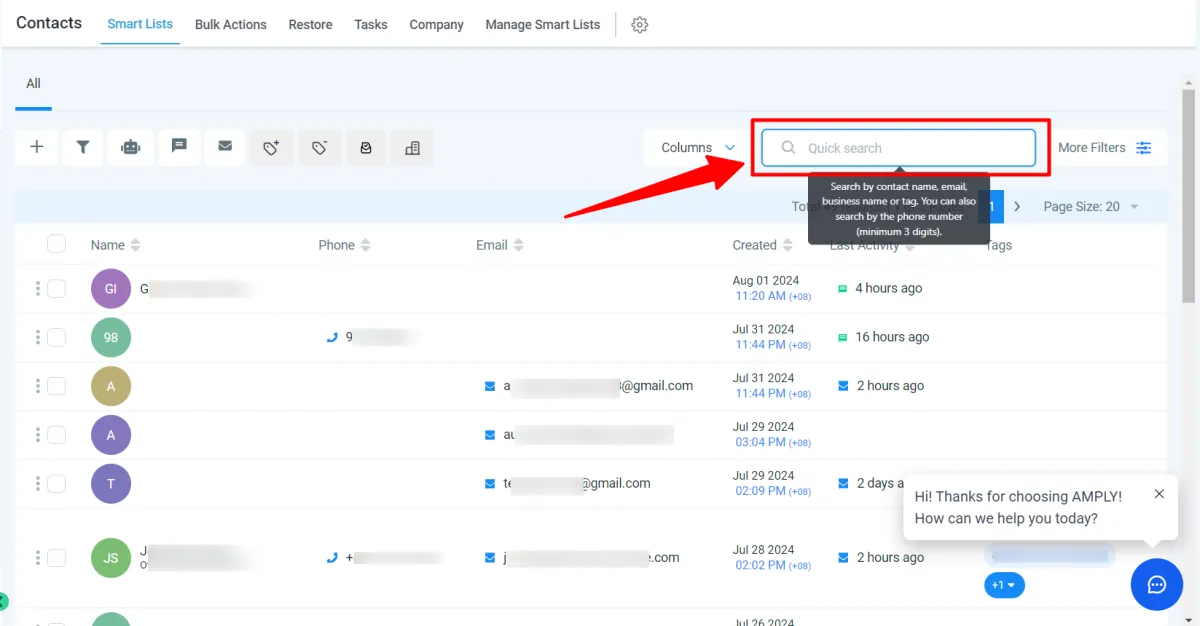


● Sorting Contacts: You can sort contacts by different criteria such as name, date created, or last activity by clicking on the column headers.

Filtering Contacts: Use the filter option to narrow down contacts based on specific criteria like tags, status, or custom fields.

2. Adding a New Contact

To add a new contact to your list:

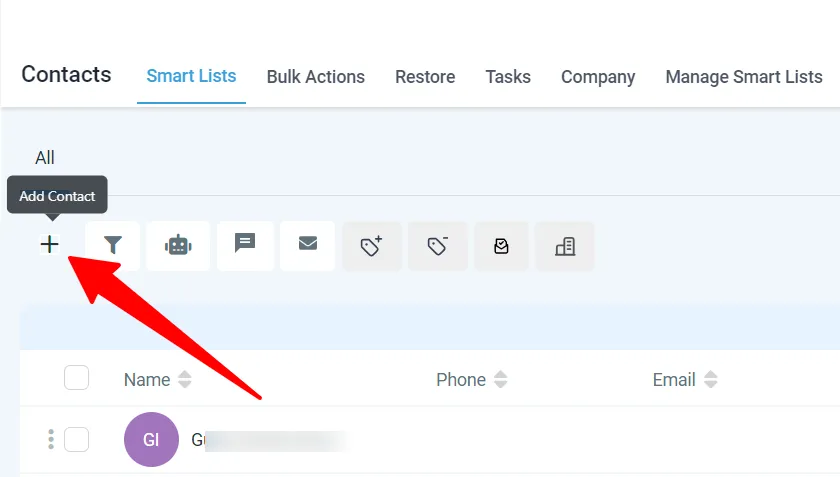
● Click the "Add Contact" button.

add contact

● Fill in the contact details in the provided fields, including name, email, phone number, and any other relevant information.

● Click "Save" to add the contact to your list.

3. Contact Details

Clicking on a contact's name will open their detailed profile.

Left panel:
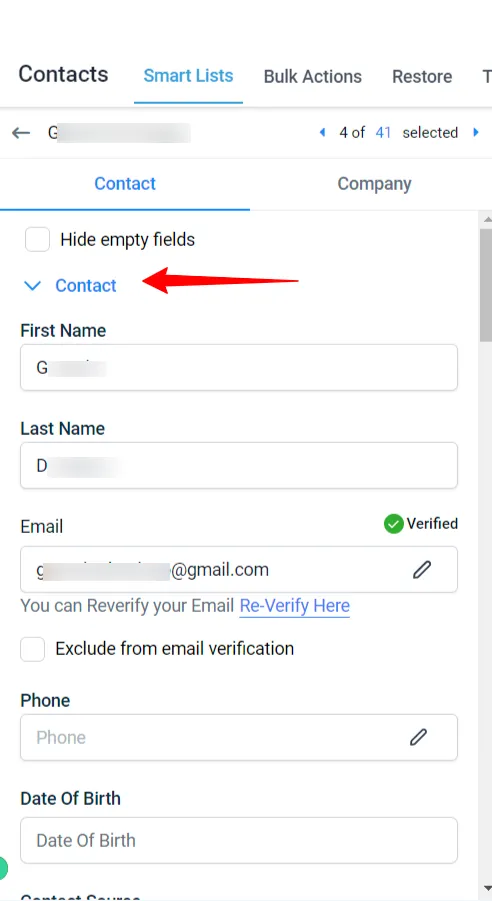
● Contact: This section shows the basic information of the contact, such as name, email, phone number, and address, date of birth, etc.

● General Info: This section shows the basic information of the contact's business such as business name, business address, website, and timezone.

● Additional Info: This section shows any other custom fields you set e.g. contracts, additional questions, etc.

Middle panel:

The middle panel on a contact page is where you will see all correspondences/conversations between you and that contact.
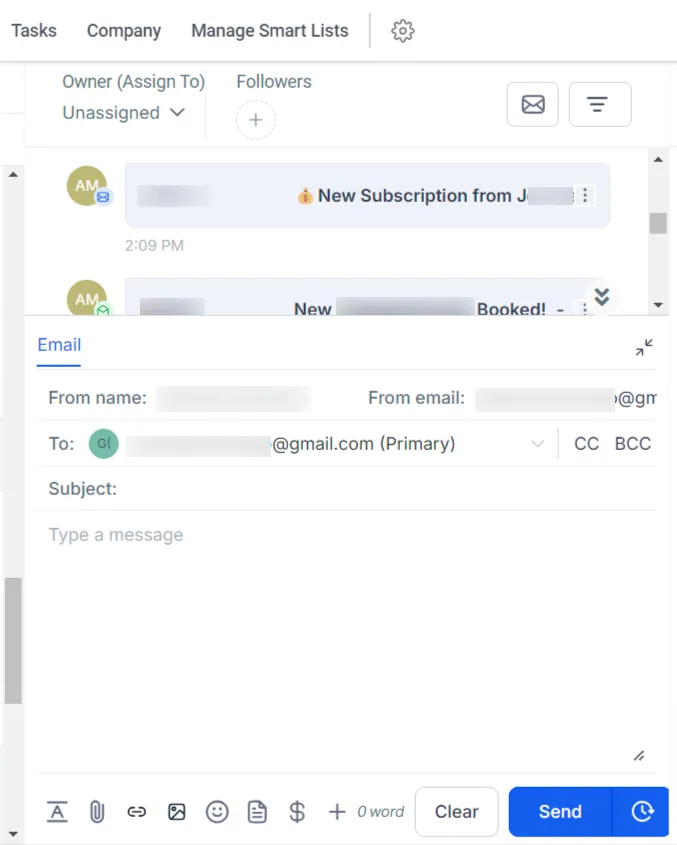
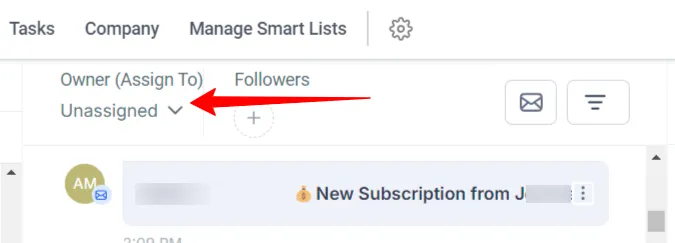
● Owner (Assign to): This drop-down at the upper part lets you assign the contact to any of your team members who may be working with the contact.

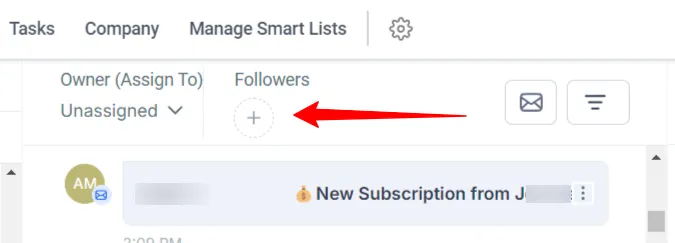
● Followers: The "Followers" feature enables several users to simultaneously track and work on the same record. With it, you can assign up to 10 users as followers to view and modify the CRM record.

● Mark as Unread: This is the "mail" icon at the upper part of the middle panel. Use this to mark the conversation as unread so it appears in the Unread section of the "Conversations" menu.

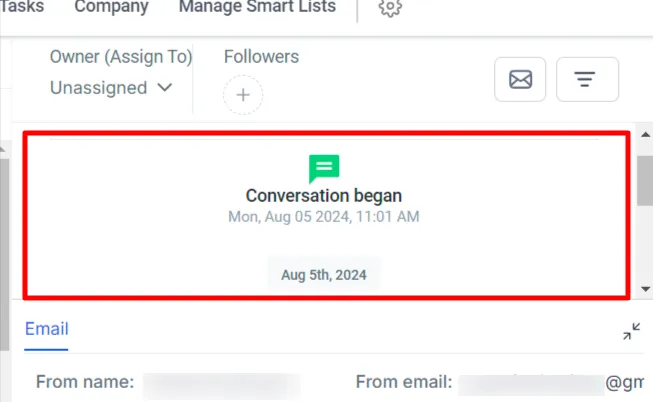
● Reading pane: This is the panel where you will find all the email threads or messages sent and received between you and the contact. This part also tells you when you added the contact, indicated by the date and time when the "Conversation began".

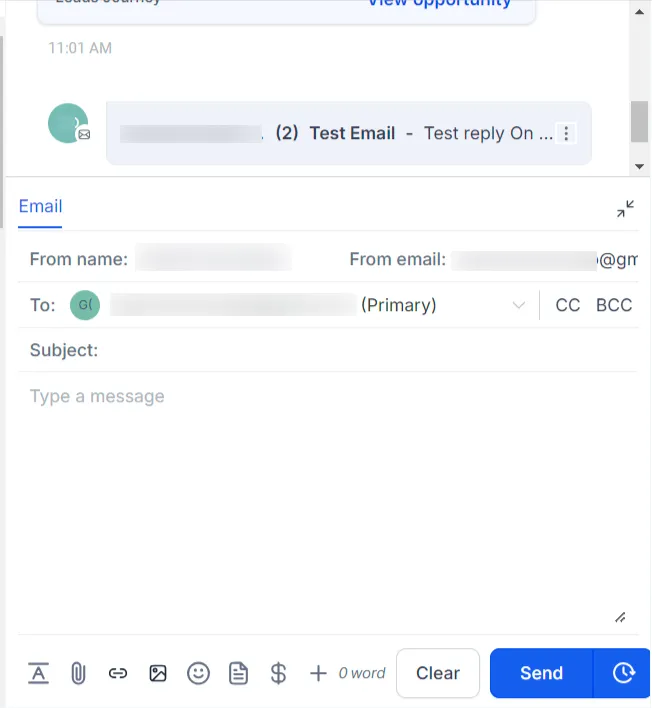
● Message field: This part of the middle panel in a contact's page is where you can set the sender (your) details such as:

° From name: This can be your name or your team's name.
° From email: You can set your own email address or your company's main contact email address.
° To email: If a contact as multiple email addresses on file, you can click the "To email" to select the email address you want to send your message to.
° Subject: Your email's subject.
° Message: This is where you compose your email message to your contact.

4. Bulk actions

The Contacts menu allows you to perform actions on multiple contacts at once.
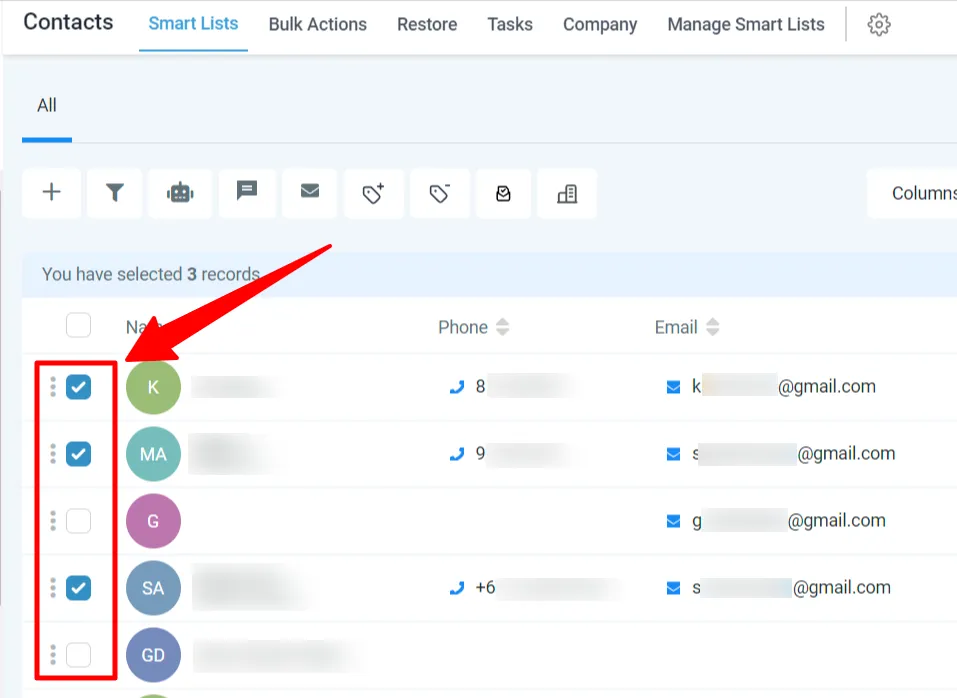
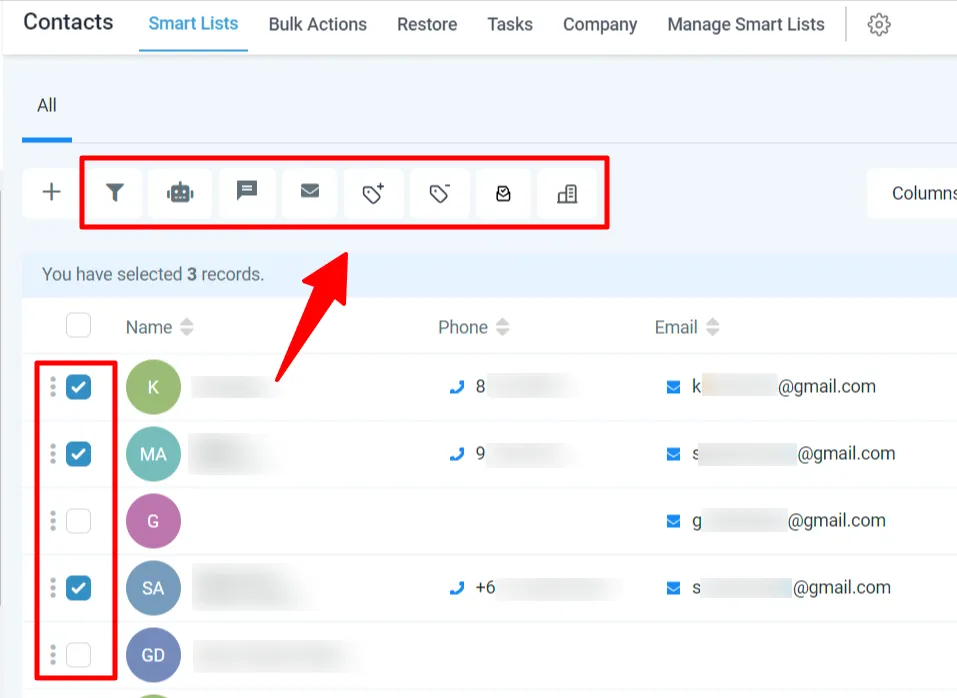
● Selecting Contacts: Use the checkboxes next to each contact's name to select multiple contacts.

● Bulk actions: Once you have selected contacts, you can choose to send emails, add tags, delete contacts, or export contact information.

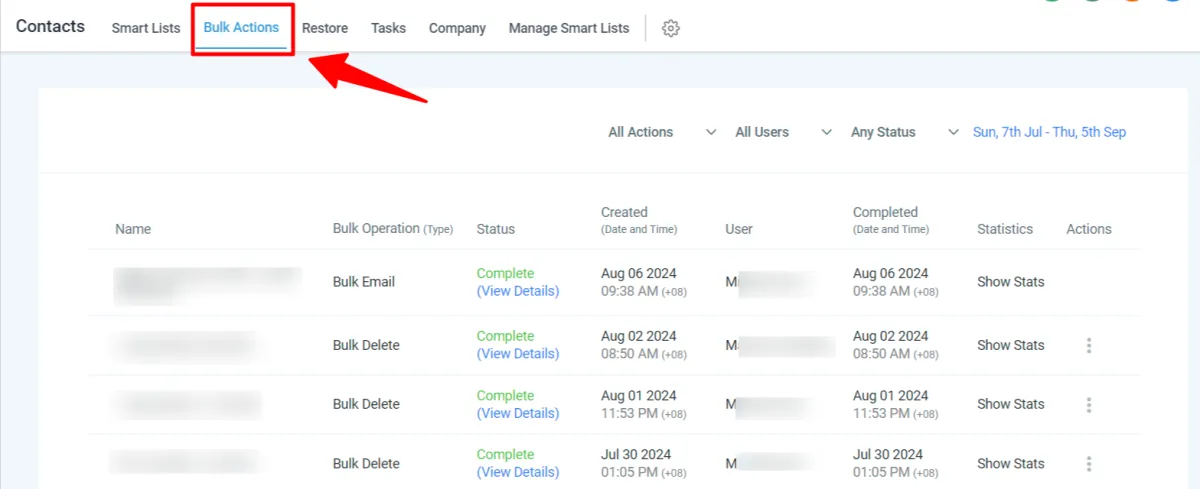
To see the logs of bulk actions performed, navigate to the "Bulk Actions" menu in the "Contacts" page. On this page, you'll see what actions or operations were done, who initiated them, when the actions were taken, and what the status of the actions are.

5. Managing Tags

Tags help you categorize and manage your contacts.
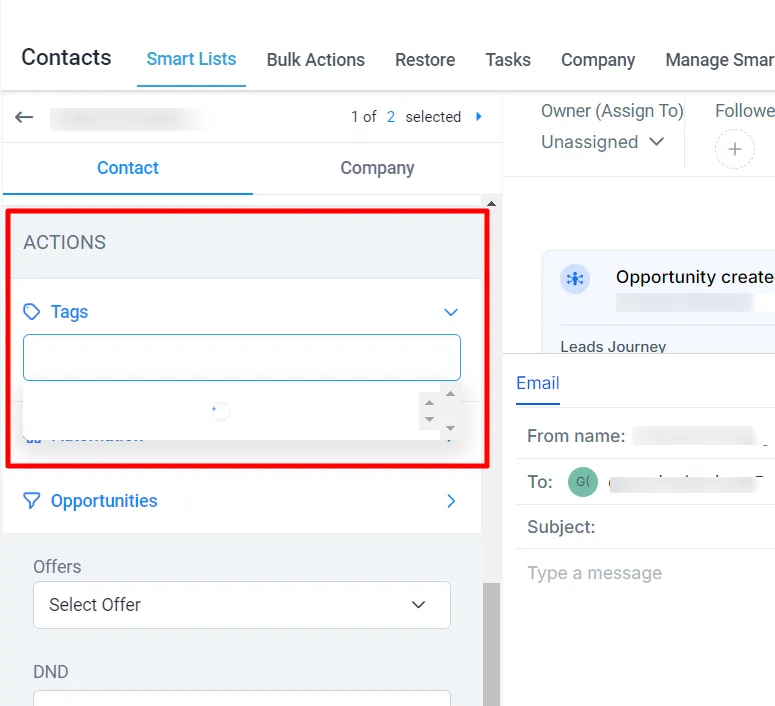
● Adding tags: You can assign tags to contacts individually from their profile by going to the "Actions" section and typing in the tag in the box. Select from previously added tags or create a new one.


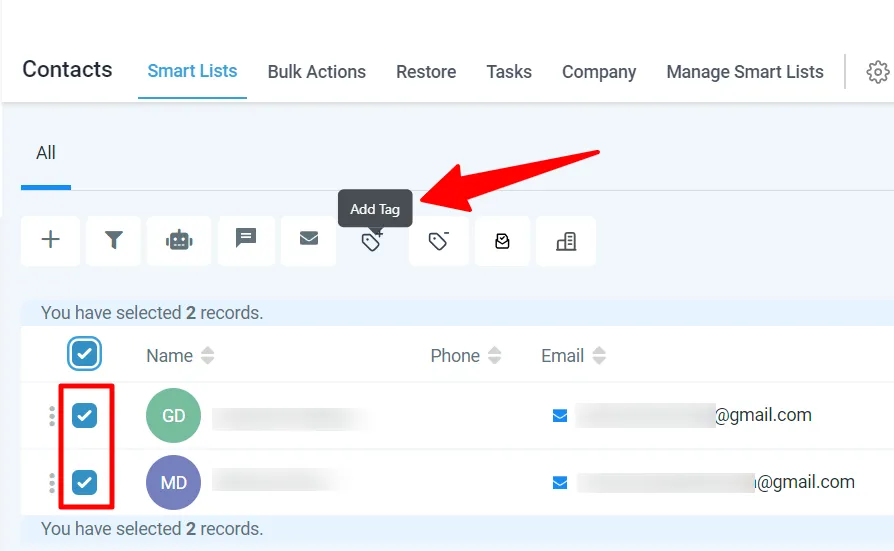
Or assign tags to contacts in bulk using the bulk actions menu. Tick the boxes next to the contacts you want to add tags to.

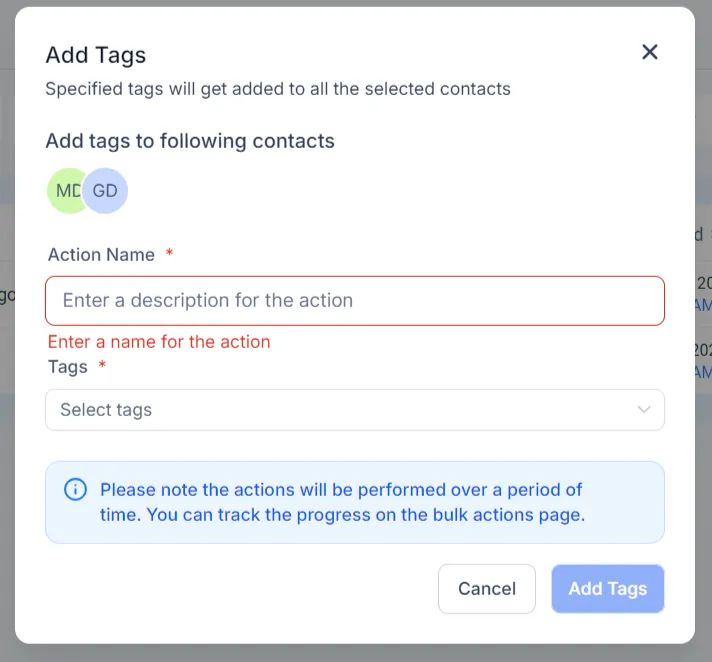
Add a description for the action, select the tags you want to apply, and click "Add tags".

6. Custom Fields

Custom fields allow you to store additional information about your contacts.

● Creating Custom Fields: Go to the Settings > Custom Fields section and click "Add Field." Choose the type of field (text, number, date, etc.), enter the name, and click "Save."

● Using Custom Fields: Custom fields will appear in the contact details section, where you can enter the relevant information for each contact.

Contact Us

Need help with your AMPLY account?

Join our Community!

Connect with thousands of AMPLY users just like you!