
Websites
Build and monetize your online presence with a fully integrated website - from digital products to e-commerce sales.


Move your audience off social media and own your relationship with them

Use the right metrics, organized into reports you’ll actually use.
Automatically collect, respond to, and analyze customer feedback from email, SMS, Google My Business, and Facebook.

Automate Instagram and Facebook DMs to capture leads, deliver offers, and drive sales — even while you sleep.

Build dynamic landing pages without needing a designer

Create marketing emails worth opening

Automate and scale with Amply360’s proven, ready-made Funnels
Create and manage Workflows to automate business processes, improve efficiency, and increase conversions.

Plan, schedule, and publish content across platforms, so you stay consistent without the chaos.

Engage leads 24/7 with intelligent chatbots that qualify, nurture, and convert — automatically.
Quickly find the right help for where you’re at

Curated expert insights and process to grow your business
Refer a friend and earn lifetime commissions for each activated referral

Official Facebook Group to connect with fellow AMPLY Aces, ask for help and get feedback
1. Log in to Amply
Open your Amply dashboard.
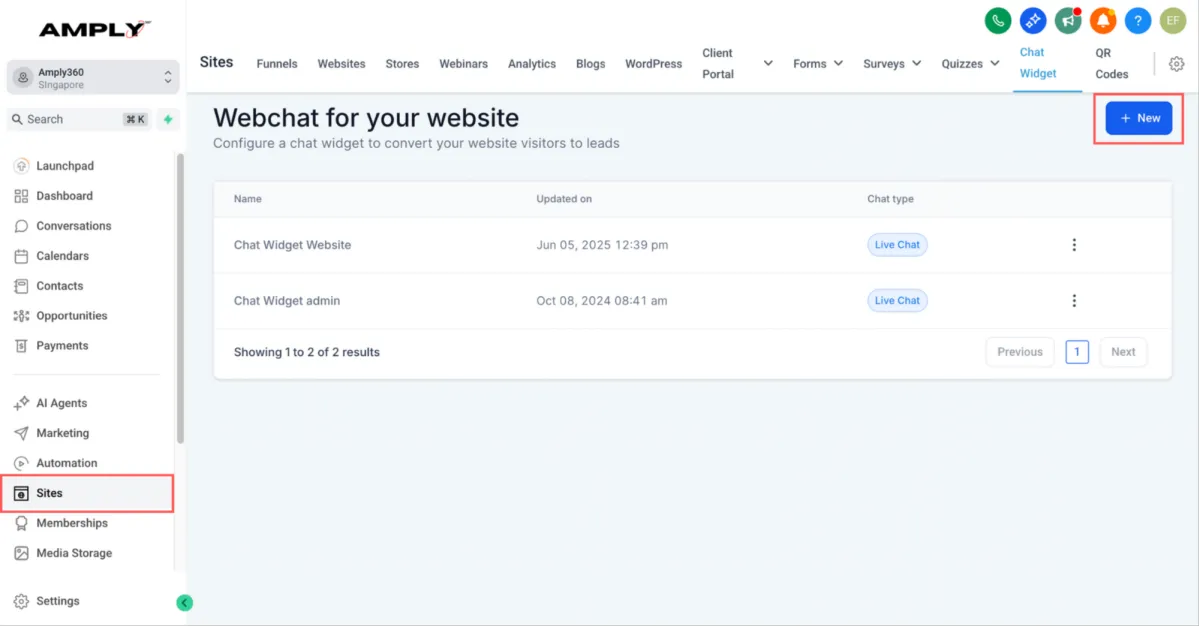
2. Go to the AI Chatbot Settings
In the left-hand menu, click Sites.
Select Chat Widget.
Click the New button (top right).
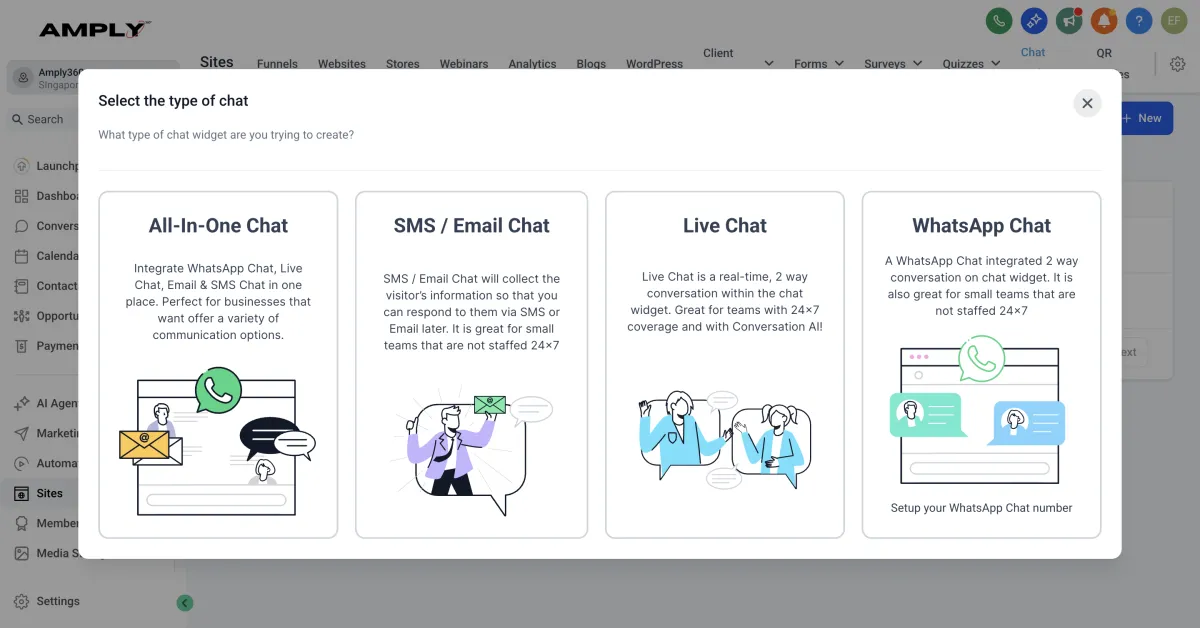
3. Select Your Chat Type
You’ll see 4 options. Pick the one that best fits your needs:
1. All-in-One Chat – combines multiple channels (website, SMS, FB/IG, WhatsApp) into one widget.
2. SMS/Email Chat – lets visitors start a chat that continues in SMS or email.
3. Live Chat – purely website chat handled by you or your team.
4. WhatsApp Chat – connects directly to your WhatsApp Business account.
4. Customize Your AI Chatbot
After choosing a chat type, you’ll see three main tabs on the left: Style, Chat Window, and Messaging.
Here’s how each works:
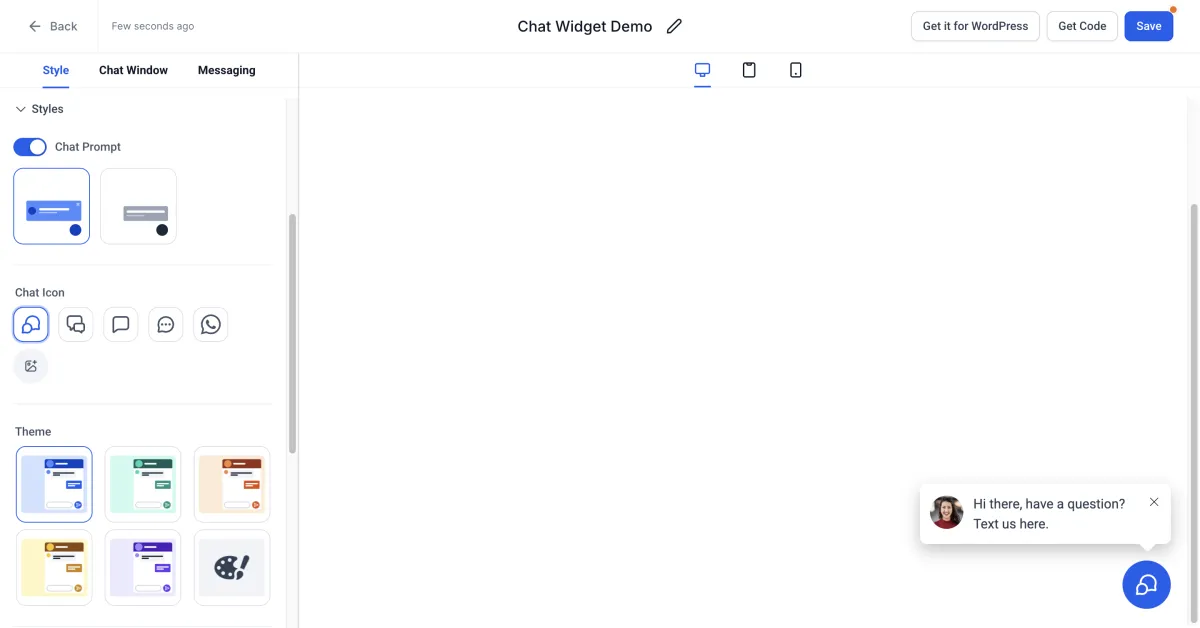
1. Style
This is where you design how your AI Chatbot looks on your website. You can:
Customize the All-in-One Initial Message and Welcome Message - set what visitors first see before they start chatting.
Select Chat Icon, Theme, and Widget Position – choose the bubble style, overall theme, and whether the chatbot appears on the bottom left or right of your site.
Change the Avatar Image – upload your own logo or a custom picture to replace the default avatar.
As you make changes, watch the live preview on the right to see exactly how your AI Chatbot will appear to visitors.
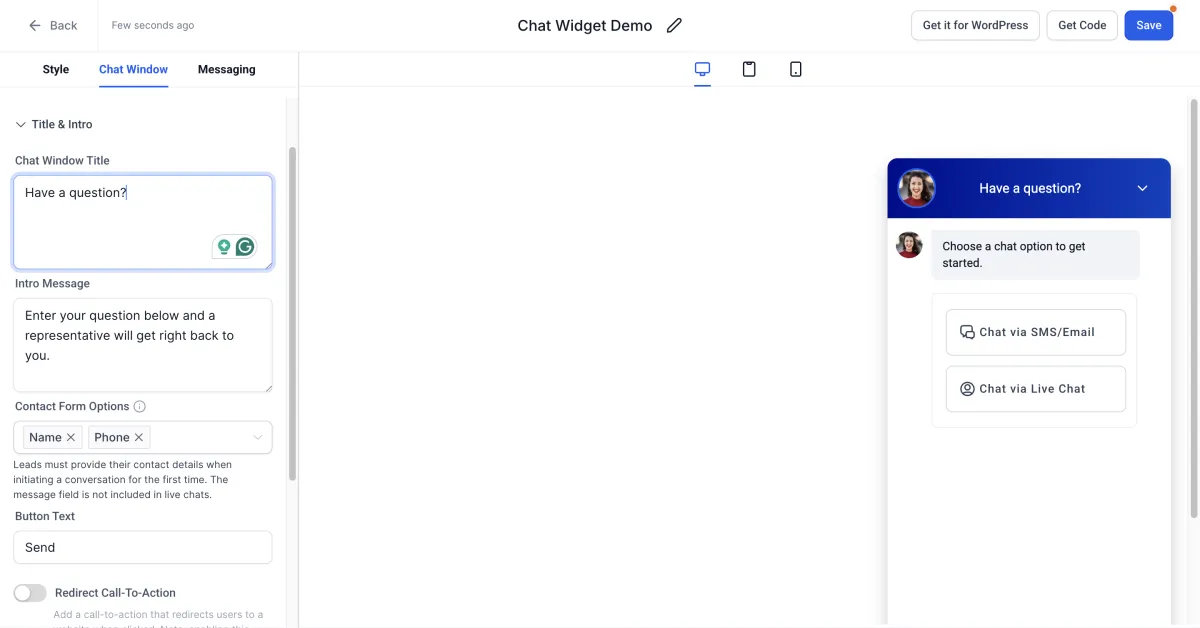
2. Chat Window
This is the actual chat box that opens when a visitor clicks on the bubble.
Title & Intro Message
This is what visitors will see at the top of the chat window.
Example: “Hi 👋 I’m your AI assistant — how can I help you today?”
Live Chat Assigned
Set a timeout delay.
Customize the waiting message shown to visitors before someone responds.
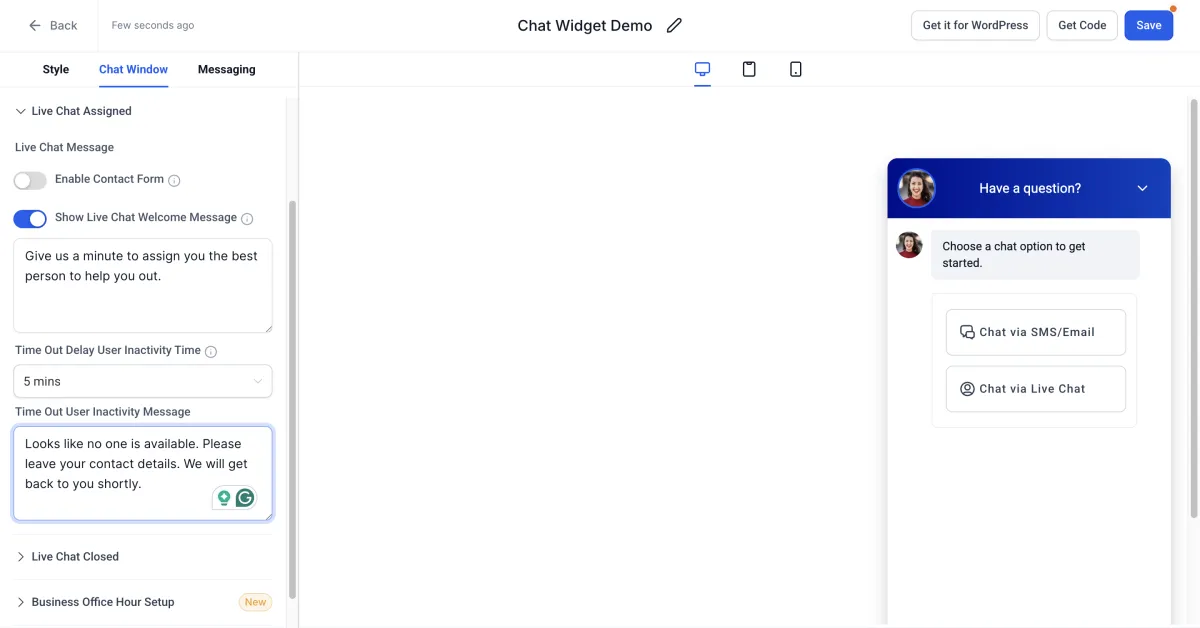
Live Chat Closed Message
Set how long a contact can be inactive before the chat closes.
Customize the closing message they receive.
Business Office Hours Setup
Set your open/close hours so customers know when to expect a live reply.
Outside office hours, your “Outside Office Hours Welcome Message” will appear.
Additional Options
Agency Branding: Turn this on/off depending on whether you want Amply branding visible.
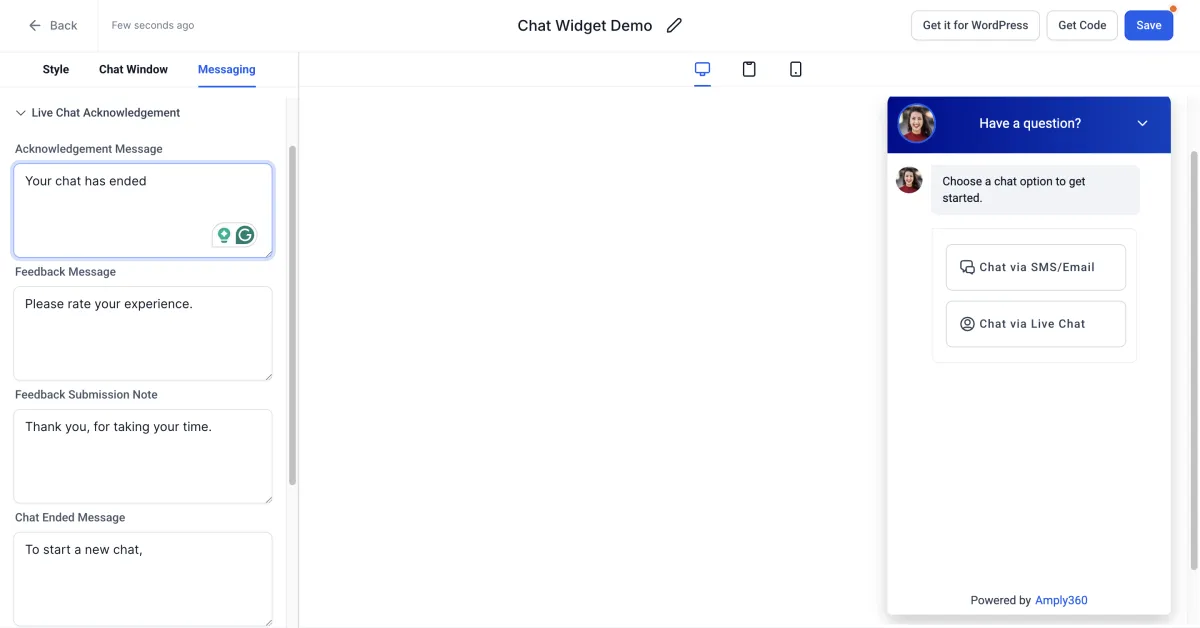
3. Messaging
This is where you can customize acknowledgement message/feedback message/chat ended message.
5. Save Your Settings
Simply click 'Save' - the top right blue button, to apply all your customizations to the chat widget.
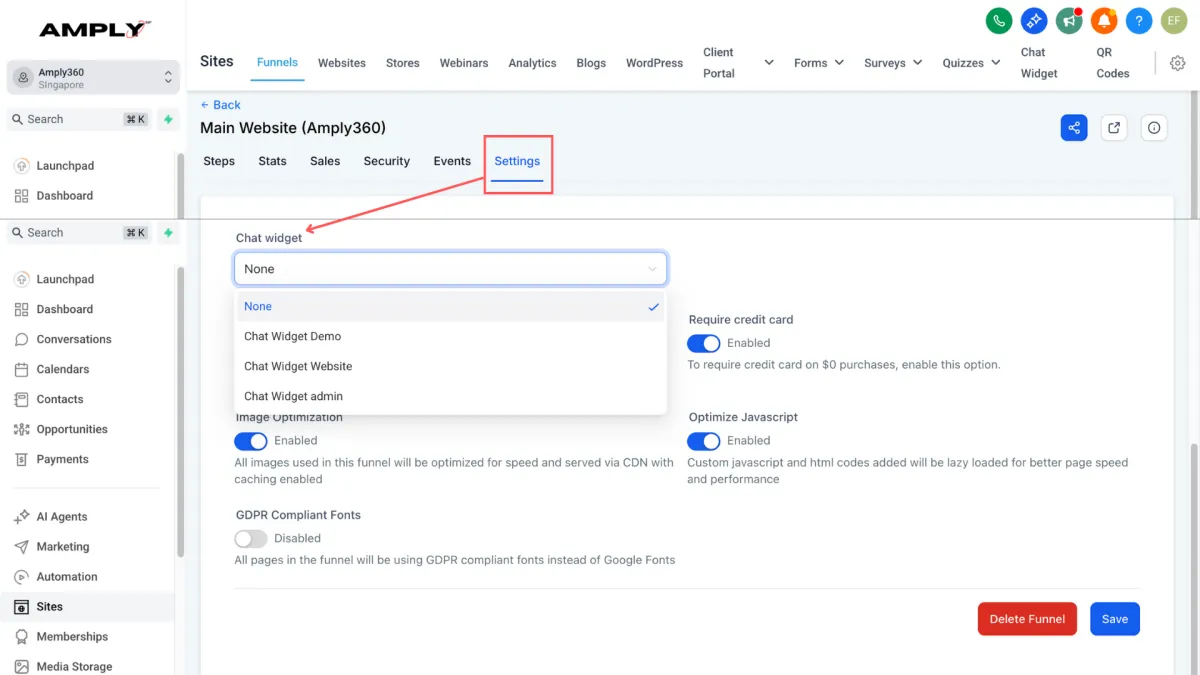
6a. Add Your AI Chatbot (For Sites Hosted on Amply)
Go to the website or funnel where you want it active, open Settings > Chat Widget, and select your chatbot to enable it.
6b. Add Your AI Chatbot (For Sites NOT Hosted on Amply)
Copy the generated JavaScript embed code and paste it into the body or the footer section of your website.
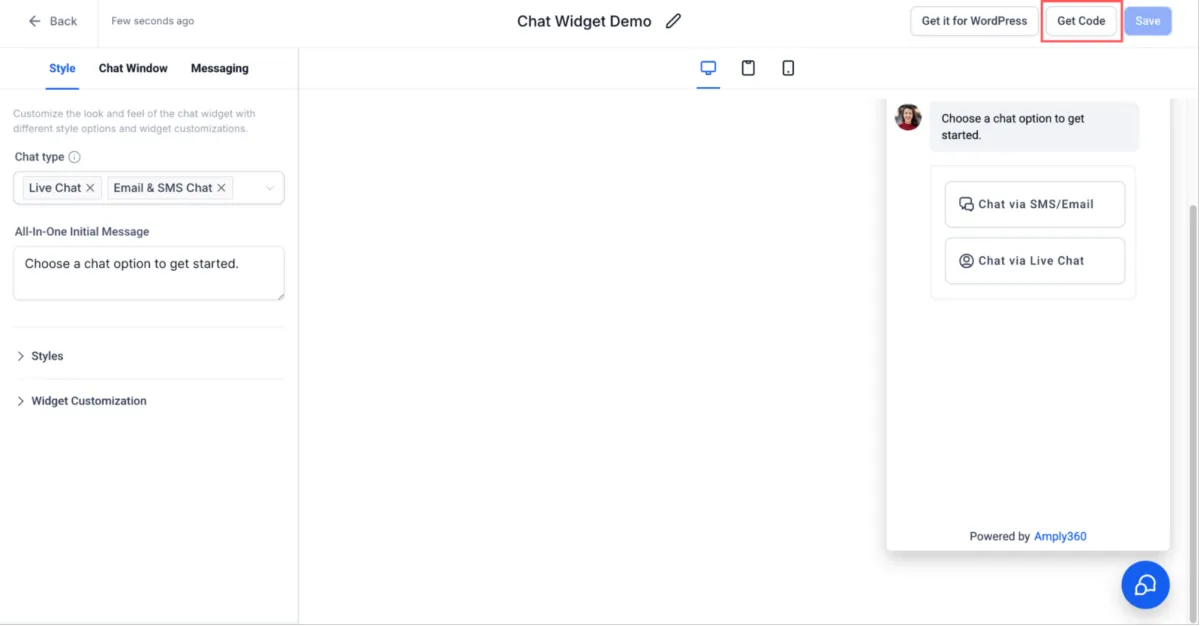
If your site is on WordPress:
Click "Get it for WordPress" → it will download the Amply360 WordPress Plugin (a .zip file).
In your WordPress admin dashboard: Go to Plugins → Add New → Upload Plugin.
Upload the .zip you downloaded and click Install Now.
Activate the plugin.
Once activated, log in with yourAmply360 account details or paste your App ID / Tracking code.
The plugin automatically injects the chat widget across your whole WordPress site (no need to touch HTML).
...and you’re all set! Your chatbot will now greet visitors, capture leads, and keep conversations flowing even outside business hours.

Resources
Aces Stories
Free Courses & Guides
Resource Hub
Support


