Lesson 2: Conversations

Inbox Overview

AMPLY Conversations are a game-changer for small businesses - offering a centralised hub to handle all their messages effortlessly.

Inside Conversations, you get a comprehensive view of the details of your leads. It's not just about viewing; you can seamlessly reply via email or SMS, apply filters for priority responses, and seamlessly integrate them into workflows.

Here's the lowdown:

Respond directly within the Conversations dashboard

Sort and filter messages by age, ensuring you never miss a beat

In this tutorial, we’ll provide an overview of the Inbox section of your menu. Read on to learn how to navigate through this section.

Left Panel

1. Accessing Your Inbox.

● Click into your Inbox.

● In the first column on the left, you’ll see a list of your messages.

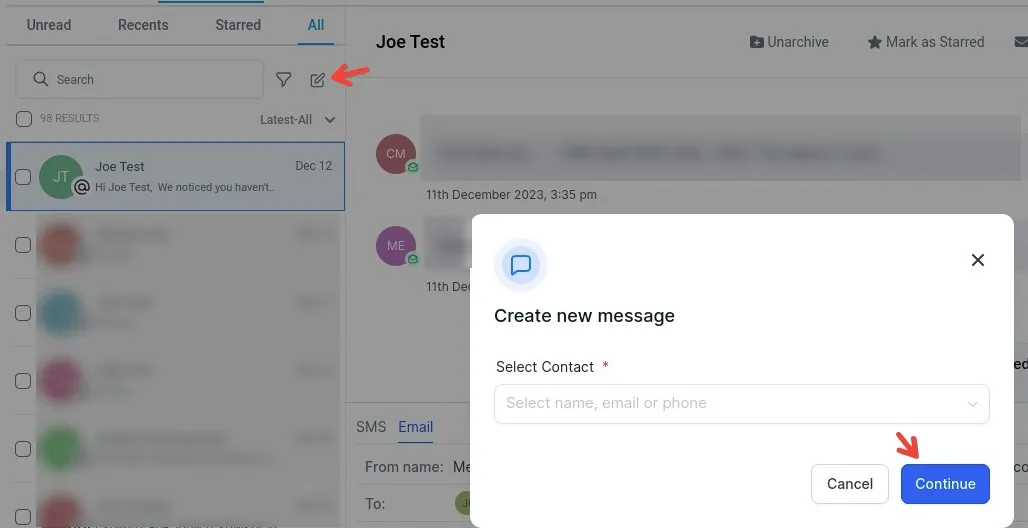
● Using tabs, you can navigate between Unread, Recents, Starred, and all messages. Unread messages are messages that still need to be read. Recent messages will display the most recent messages. Starred messages will have a list of marked messages. All will, of course, be all of your messages.

● You can also start a conversation. Click on the write icon, and type your contact to start a conversation.

Middle Panel

1. Viewing Inbox History

● You'll see the conversation history in the center when you click on a message.

● You can scroll up and “fetch older messages”, depending on the length of history of conversations you've had with the particular contact.

● In the top bar (next to the contact’s name), you can see 4 buttons: Archive, Mark As Starred, Mark as Read/Unread, and Delete.

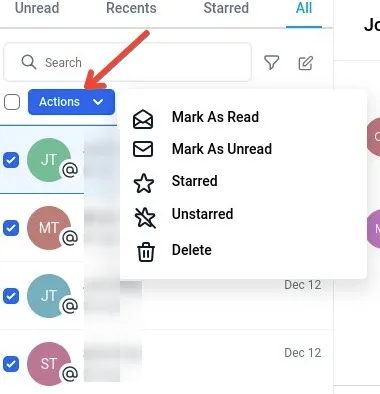
● You can also select multiple conversations and use the ‘Actions’ tab to Mark as Read or Unread, or Starred or Unstarred for multiple conversations.

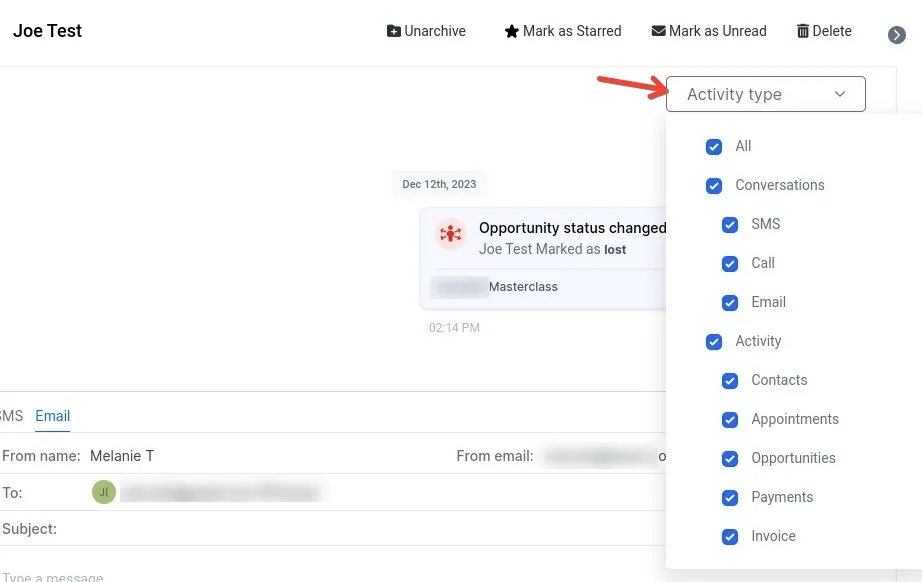
● You also have the option to filter by activity. This cool feature allows you to select what you want to see in the conversation panel. The options are, conversations (you can also filter this by channel), and activity (updates in the contact, appointments, opportunities, payments, and invoices)

2. Composing a Message via Email

● You have the option to change from conversation channels.

● If you are sending an email, you can CC and BCC another email.

● The email composer has now extra room to design and arrange, you can create emails with longer text sections and more elaborate layouts.

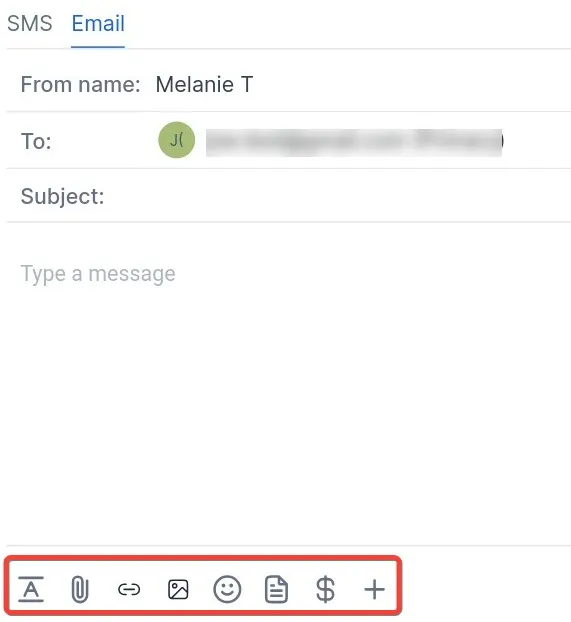
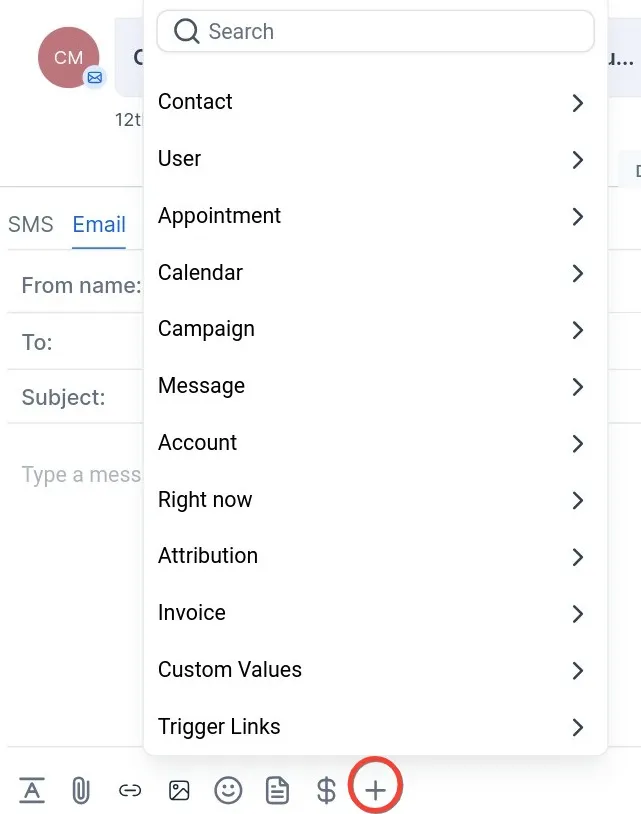
● In the email composer, this bar at the bottom shows. From left to right, they are Formatting Options, Attach Files, Add Link, Add Image, Insert Emoji, Insert Template, Request a Payment, and More Options.

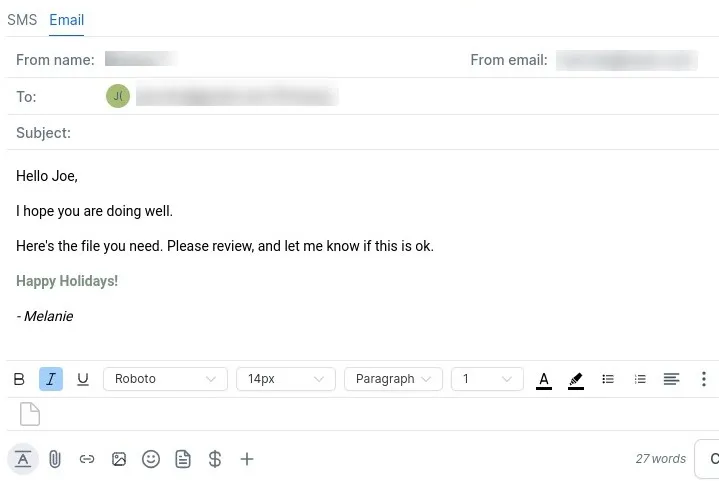
● Here’s an example of how to use the formatting option.

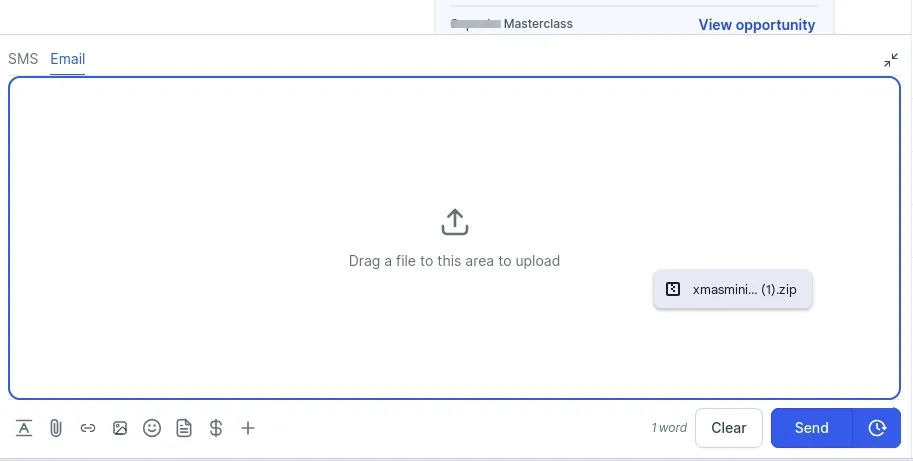
● We also have the option to drag and drop files, which makes it easier to share them.

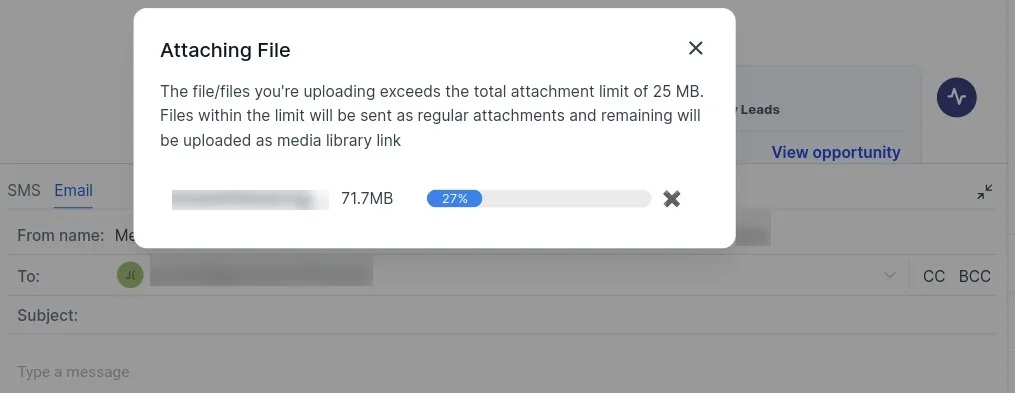
Note: If your file/files you're uploading exceed the total attachment limit of 25 MB, files within the limit will be sent as regular attachments and the remaining will be uploaded as a media library link

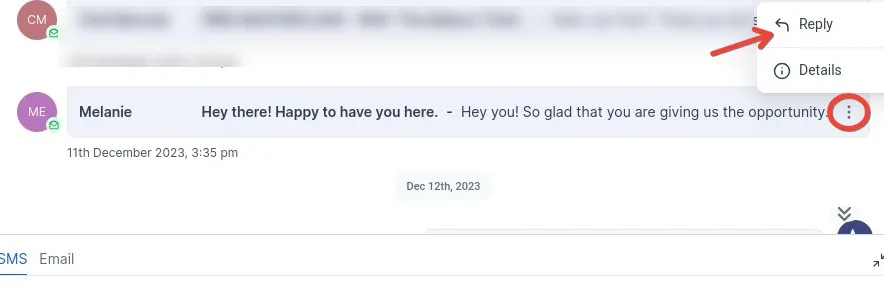
● You can reply now to the emails that show up in the thread by clicking on the 3 dots and then in the reply option.

● You can also click on Details to see the message details, such as who sent the email, the “to email address”, if it’s an outbound or inbound, the timezone if it was sent from a workflow, and the email status.

Composing a Message via SMS

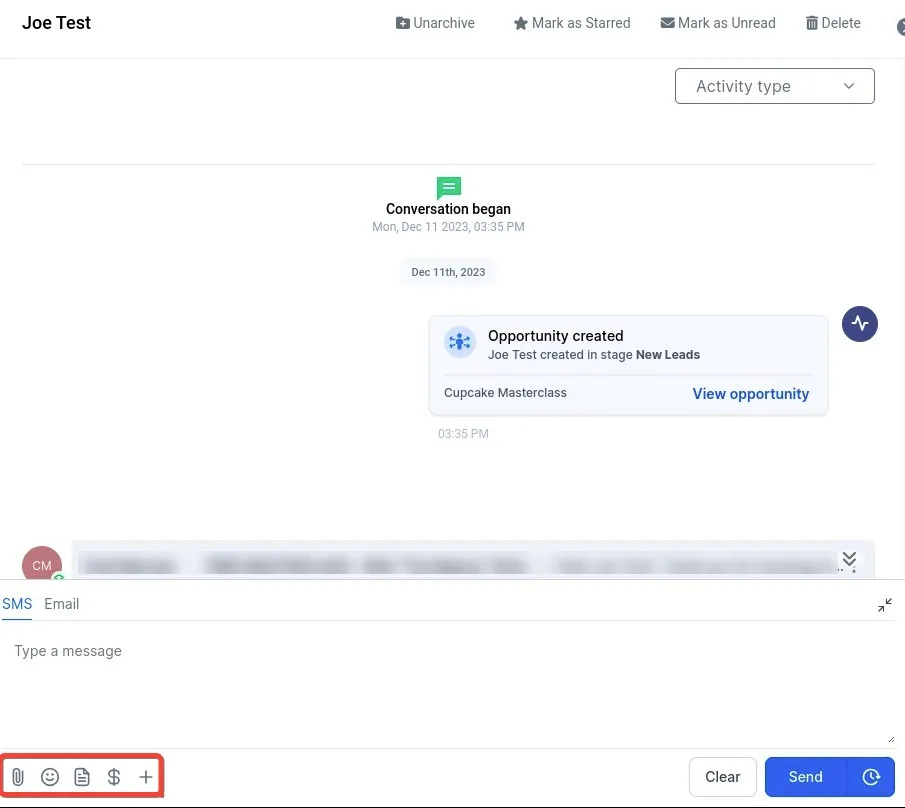
● You can also compose a message to send via SMS if you have a phone number integrated. The options here are from left to right: Attach files, insert emojis, insert templates, request payment, and more (custom fields, custom values, and trigger links).

Schedule Message

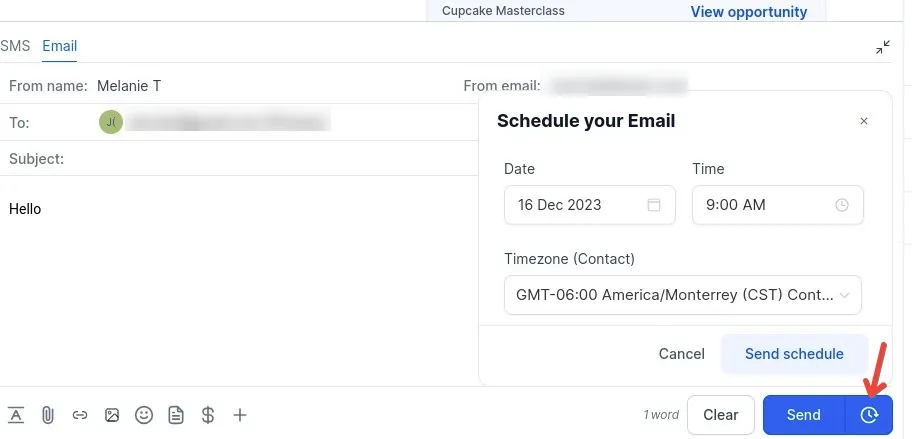
● With this feature, you will have the ability to schedule messages directly on the conversation page with your contact and send them later. This includes both, SMS and Emails.

● You can pick the date and time you want the SMS/Email to be sent. By default, will have this as sent on the next day at 9 am. You can also pick the time zone you want this message to be sent.

● Write your message, then click on the Schedule icon, and then on the Send Schedule button.

● If you want to cancel the schedule message, click the pencil icon, select the Cancel Send Link, and close the pop-up.

Right Panel

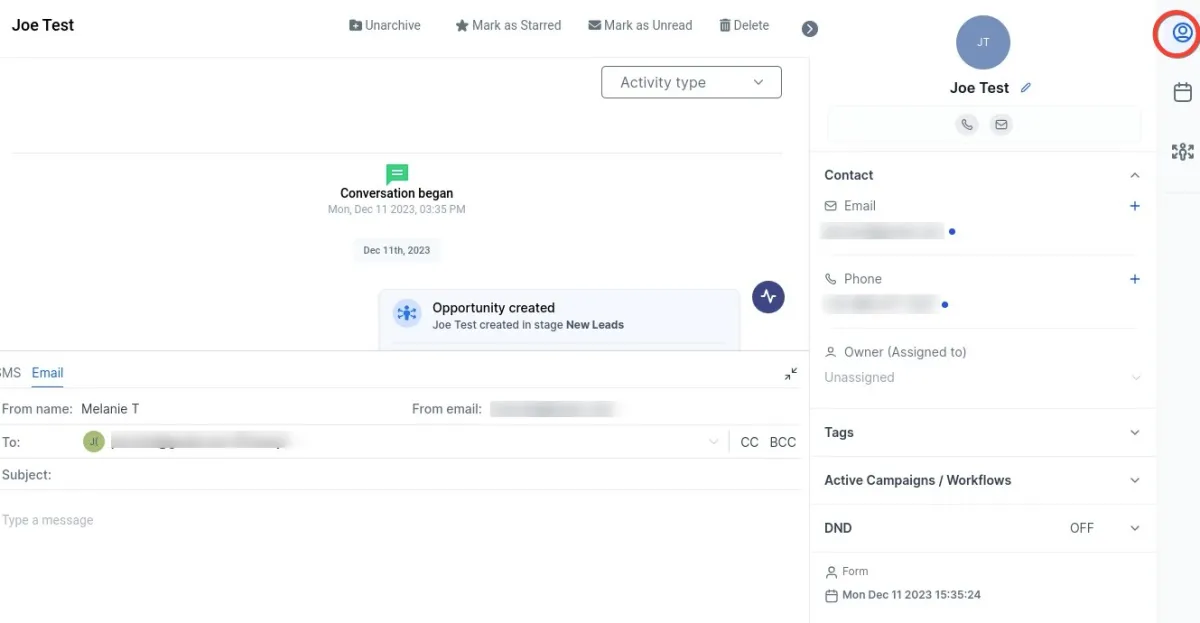
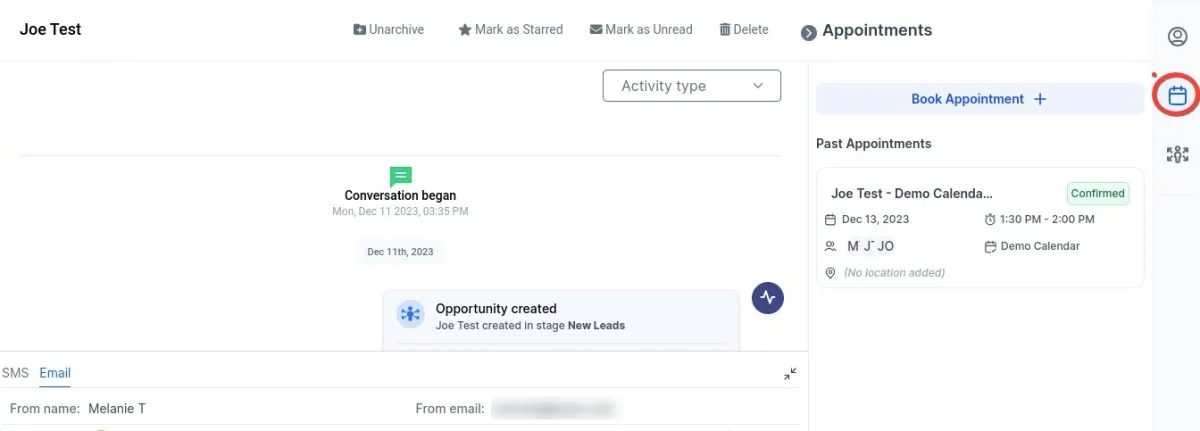
● On the right panel, we have an expandable sidebar with a Slim Panel. This can toggle between contacts, appointments, and opportunities, by managing them from a convenient location.

This will allow you to switch between Contacts, Appointments, and Opportunities.

Contact

● Manage contact details such as name, phone number, email, owner details, tags, campaign or workflow associations, and Do Not Disturb settings, all from the right panel. You can also see at the bottom where this contact was created and when.

Appointments

● Book, view, and reschedule both upcoming and past appointments directly from the right panel. This feature allows users to manage their schedules efficiently without switching screens.

Opportunity

● Create new opportunities, view all related opportunities, and edit details seamlessly. This integration enables users to manage their sales pipeline effectively within Conversations.

Contact Us

Need help with your AMPLY account?

Join our Community!

Connect with thousands of AMPLY users just like you!