
Websites
Build and monetize your online presence with a fully integrated website - from digital products to e-commerce sales.


Move your audience off social media and own your relationship with them

Use the right metrics, organized into reports you’ll actually use.
Automatically collect, respond to, and analyze customer feedback from email, SMS, Google My Business, and Facebook.

Automate Instagram and Facebook DMs to capture leads, deliver offers, and drive sales — even while you sleep.

Build dynamic landing pages without needing a designer

Create marketing emails worth opening

Automate and scale with Amply360’s proven, ready-made Funnels
Create and manage Workflows to automate business processes, improve efficiency, and increase conversions.

Plan, schedule, and publish content across platforms, so you stay consistent without the chaos.

Engage leads 24/7 with intelligent chatbots that qualify, nurture, and convert — automatically.
Quickly find the right help for where you’re at

Curated expert insights and process to grow your business
Refer a friend and earn lifetime commissions for each activated referral

Official Facebook Group to connect with fellow AMPLY Aces, ask for help and get feedback
First things first, let's get your amazing product listed. Think of this like setting up your store shelves—you want everything clear, attractive, and inviting!
1. Navigate to Payments > Products
2. Click Create Product

3. Fill out all the juicy details in the Product Editor (name, description, pricing, images, etc.)
4. Click Save.
Congrats! Your product is now created. Next, you can check out these handy guides to enhance your product listings even more:
Great job creating your product! Now, let's make sure customers can actually find and buy it. Think of this step like stocking your storefront—visibility is everything!
1. Navigate to Sites and choose where you want your product to appear: Website, Funnel, or Store.
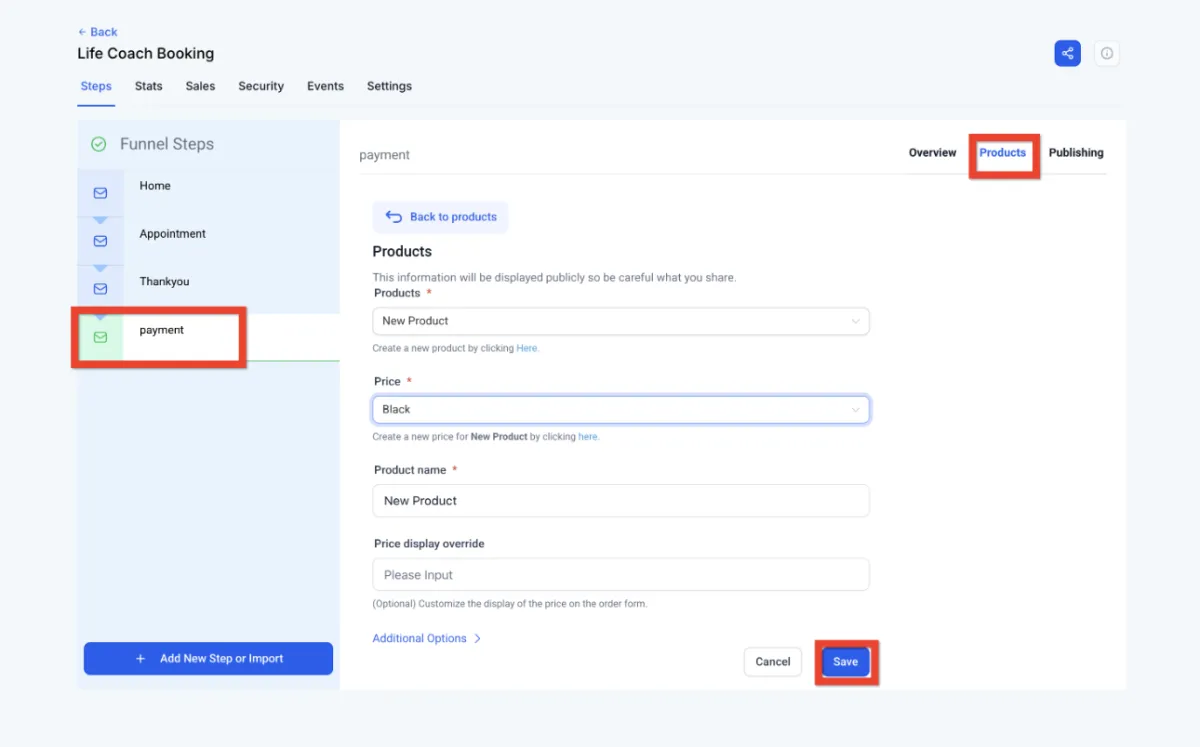
For Funnels specifically:
- Click Funnels and select your desired funnel
- Go to the Products tab
- Click Add Product
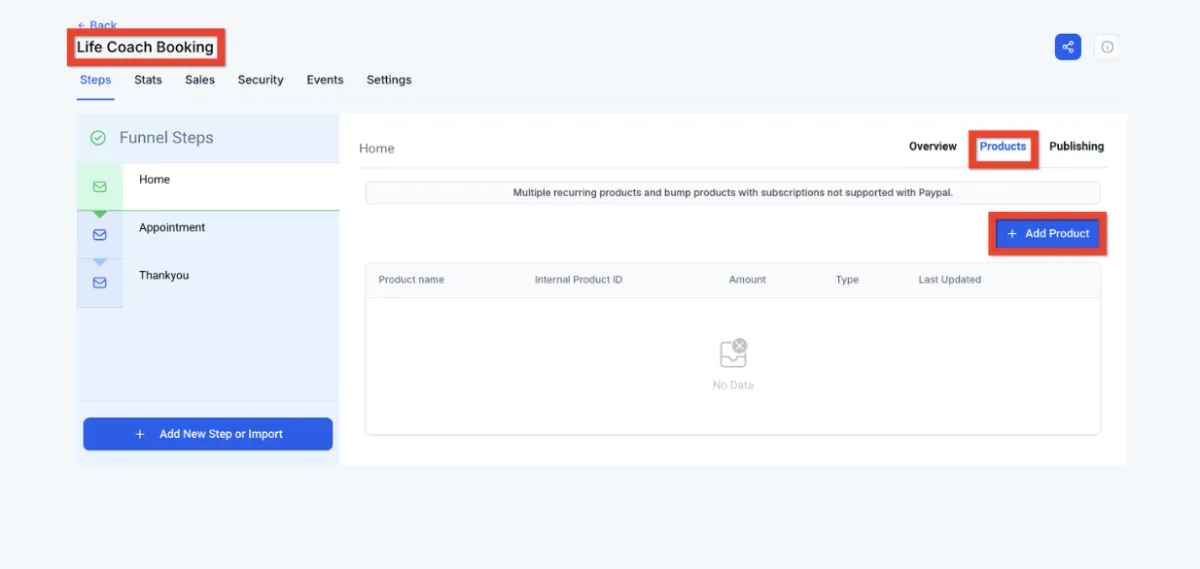
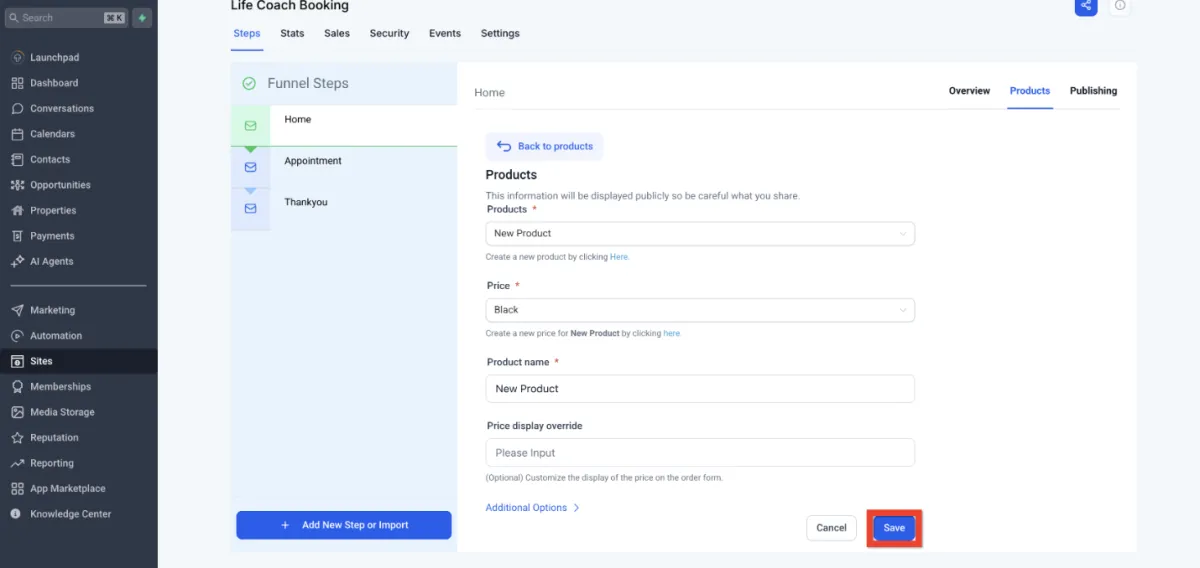
- Configure your product details
- Click Save.
Awesome! Your product is now visible to customers. Next, you can boost your checkout experience with upsells or special offers.
Alright, your product's ready and visible. Now let's get the checkout process streamlined! Think of this step like opening the cash register - quick, easy, and secure.
1. Navigate to the Site Editor
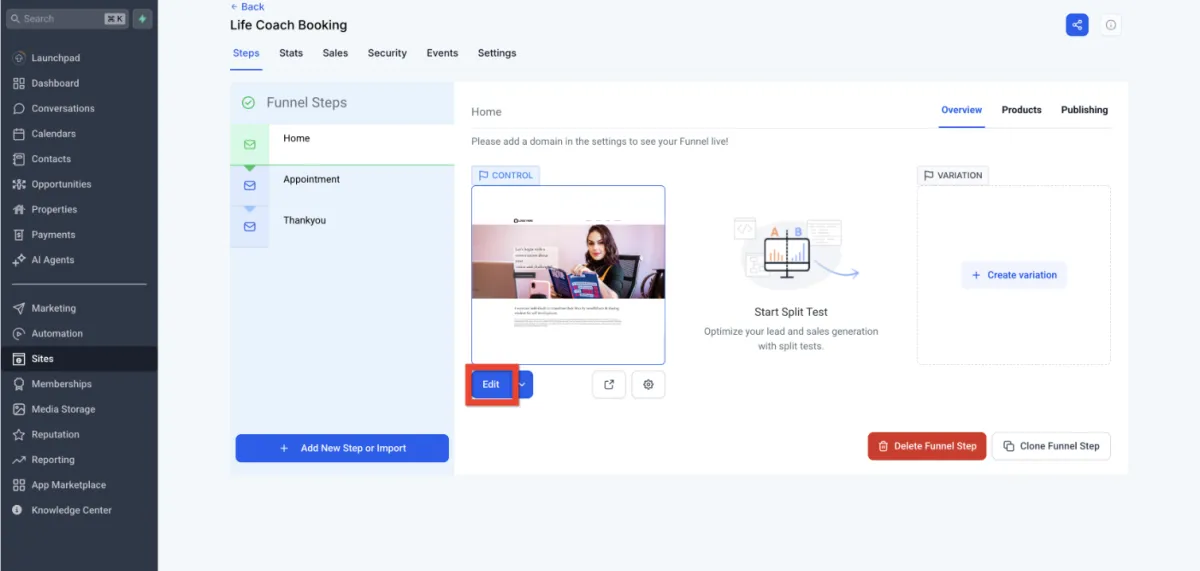
2. Select the funnel page that will have the checkout form.
3. On the page, add a full width section element

4. Inside the section, add a one column row.
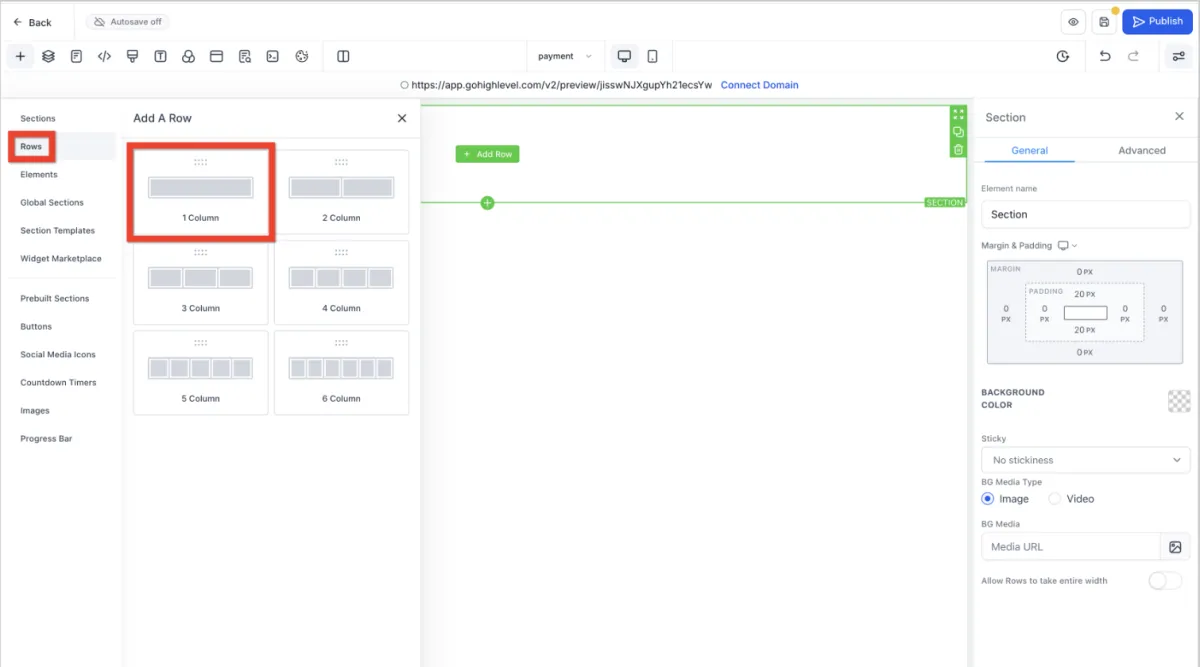
5. Inside the row, add a one or two step order form.
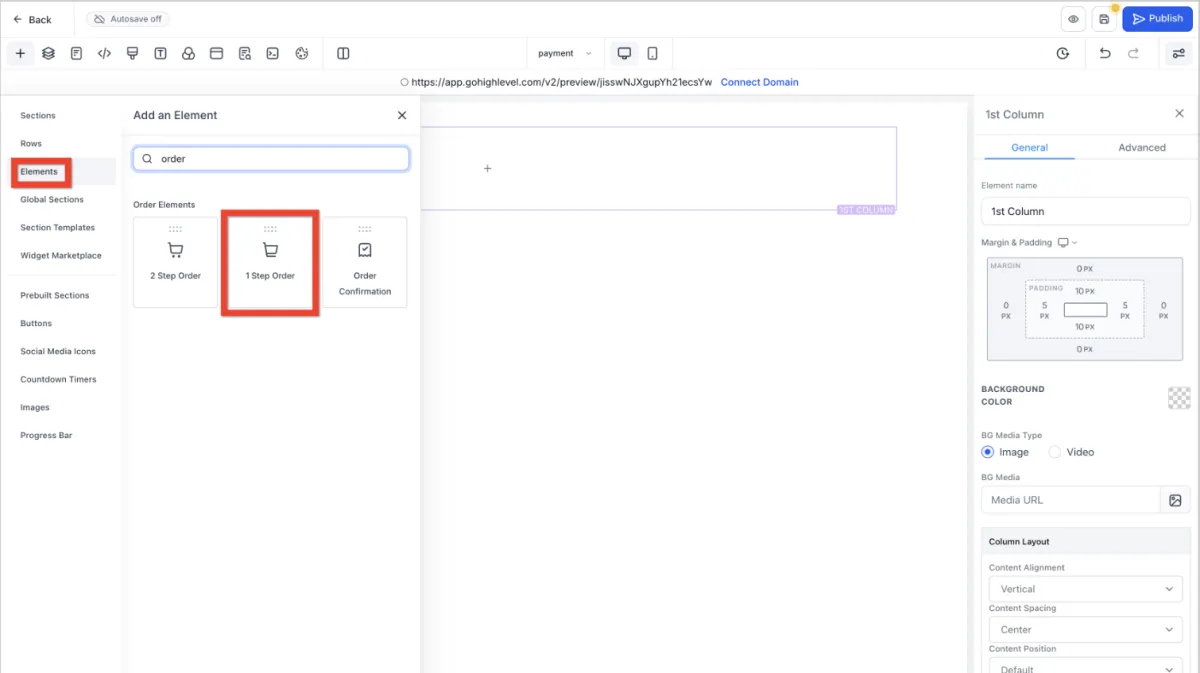
6. Customize the order form, then click Save and Publish.
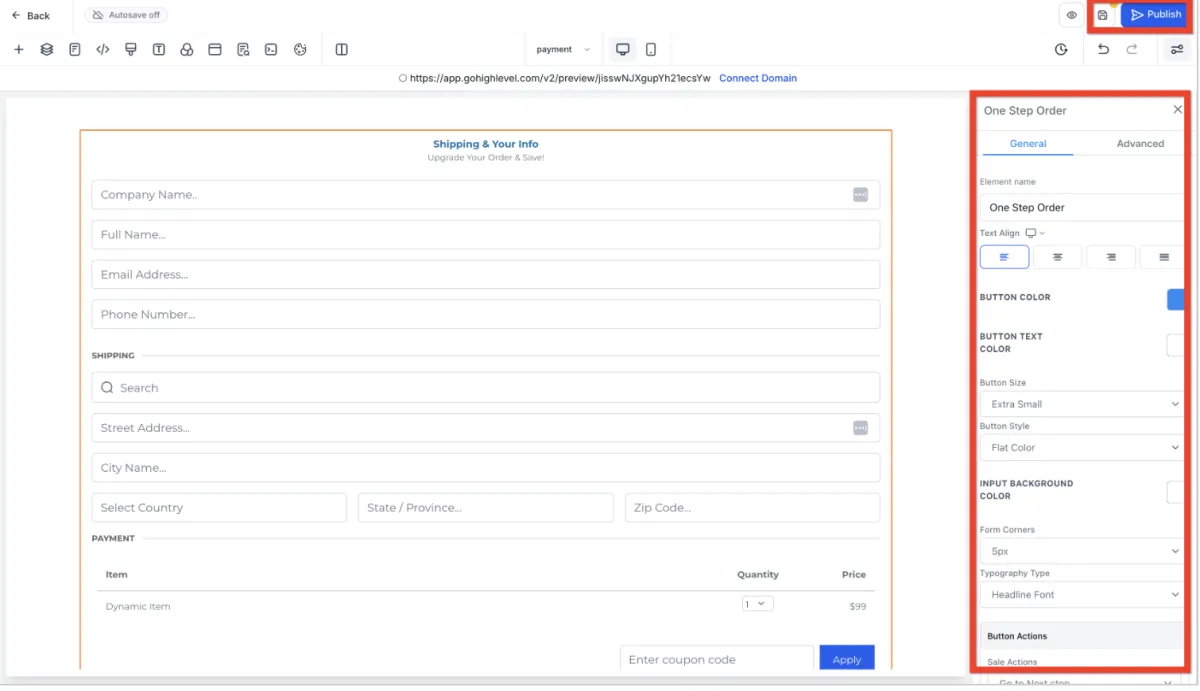
7. Make sure the product is added to the same page as the order form.
Fantastic! Your customers can now smoothly complete their purchases. Next, why not experiment with sticky contact options to boost conversions?
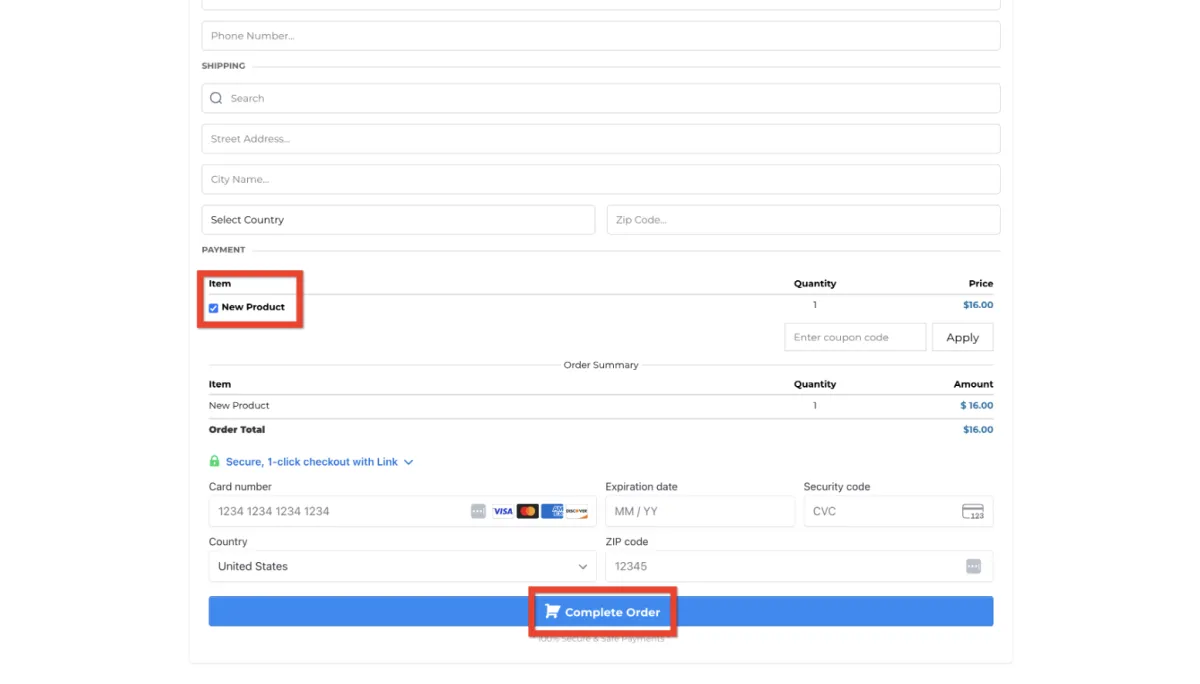
Your funnel order form should look something like this:
📚 Guide: Setting Up Affiliate Marketing in Amply
Learn how to create affiliate links, promotional codes, and automated commission tracking to let others sell your products for you.
Amply360
The all-in-one business platform built by a mom entrepreneur, for solopreneurs and business owners who'd rather grow their business than troubleshoot software.
© Amply360 | All Rights Reserved.


